Recipes for National Cooking Programme – Week Nineteen

We’re very excited to launch our National Cooking Programme – an ‘oven-ready’ programme of x20 FREE online interactive classes for teenagers wanting to learn to cook. Here is what we’ll be cooking on Wednesday 20 October 2021 at 5.30pm which will be livestreamed on Instagram and YouTube. Please get prepared with the ingredients and familiarise yourself with the recipe so you can cook along with us.
Shopping list
Firstly, here is a handy shopping list for all of the ingredients required:
4 chicken pieces – either deboned thighs or breasts
garlic
veg of choice for grilling eg courgettes, aubergines, peppers – red, green or yellow, mushroom, spring onions, thin beans
good handful of parsley
sprinkling of thyme/rosemary/oregano
olive oil
freshly ground salt and pepper
3 lemons
2 eggs
rapeseed oil
Grilled Chicken
Ingredients
Allow one deboned chicken thigh or breast per person ie 4 pieces
2 cloves garlic
chopped good handful of chopped parsley
2 tablespoons olive oil
freshly ground salt and pepper
juice of 1 lemon
Method
1. Rub the garlic into both sides of the chicken pieces.
2. Then rub olive oil into all the chicken pieces too. We do not oil the pan but only the
chicken otherwise a lot of smoke is generated when cooking.
3. Place a large frying pan or griddle on the hob. Turn onto high heat. You will know when
the pan is ready for use because if you hold your hand about 10cm above it, the heat will
be too great to hold your hand there for long.
4. Carefully place the pieces of chicken on the hot pan and press down well. The chicken
pieces will stick to the pan at this stage so do not try to lift them. When the chicken is ready to turn, it will lift very easily. It will take a few minutes until this happens but, when ready, the chicken will come clean off the pan. Turn it over and cook the other side too.
5. Your chicken will be well cooked and coloured on both sides but it is important to ensure
that it is not pink on the inside. Chicken that is pink or red cannot be eaten unlike steak
that can be eaten rare. To check if your chicken is done, we suggest that you take a
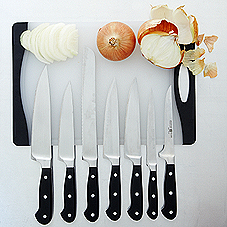
sharp knife and cut into the chicken to check that it is well cooked throughout. If there is
still pink in the middle of the piece of chicken, return it to the pan but put the heat down
low and allow the chicken pieces to cook until they are thoroughly cooked.
6. Towards the end of the cooking period, sprinkle over the chopped parsley and press well
into the chicken.
7. Season the pieces of chicken with salt and pepper and sprinkle over lemon juice.
8. Another way of cooking the chicken pieces is by placing them on a baking tray and baking
them in oven 210ºC/190ºF for about 20 minutes.
9. Then place them under the grill to allow the chicken to brown quickly.
10. Whether using a grilling pan or oven to cook the chicken, remove from the pan or oven
and allow to settle for a few minutes before serving.
Grilled / Griddled Vegetables
Ingredients
Any vegetables can be used in this dish but they need to be cut quite thin so that they grill easily.
Vegetables of choice can be courgettes, aubergine, mushrooms, peppers – red, green or yellow
2 tablespoons olive oil
freshly ground salt and pepper
good sprinkling of dried thyme or oregano or rosemary
juice of 1 lemon or sprinkling of balsamic vinegar
Method
1. Slice the vegetable of choice into long pieces in the case of courgettes, aubergines,
peppers or spring onions and cut into smaller pieces if using mushrooms.
2. Then rub olive oil into all the vegetables as well as the dried herb. We do not oil the pan
but only the veg otherwise a lot of smoke is generated when cooking.
3. Place a large frying pan or griddle on the hob. Turn onto high heat. You will know when
the pan is ready for use because if you hold your hand about 10cm above it, the heat will
be too great to hold your hand there for long.
4. Carefully place the veg of choice on the hot pan and press down well. Do not put too many
on at one time or the heat of the pan will be lowered and the veg will become watery.
5. You will see when the vegetables are starting to brown and that is when you turn them
over so that they do not burn. Use tongs to do this as easiest way of turning them.
6. Cook on the other side too. If they still require further cooking, then turn the heat down
and allow them to gently cook for a little while more.
6. You will know that your veg are cooked when you pierce them with a sharp knife and it
goes into them easily.
7. Remove them from the griddle and place on a serving dish.
8. If you are making more veg, repeat the same process again until all of the veg are cooked.
9. Season them all with salt and pepper and sprinkle over lemon juice or balsamic vinegar.
10. Vegetables can also be grilled in the oven. To do this rub them with oil and herbs and
place them on a baking sheet under the grill.
11. Watch carefully so that they do not burn. Turn them over and do the other side.
12. If they need more cooking, turn off the grill and turn on the oven and allow them to cook
for a few minutes more until tender.
Aioli
Because aioli contains raw eggs, you should use good organic eggs to avoid any risk of
salmonella contamination. Provided that you are very patient in amalgamating the yolks and oil, you will produce a perfect aioli. Aioli will keep for about a week in the refrigerator.
Ingredients
2 egg yolks
225ml/8 ozs light olive oil or a mix of olive and rapeseed oils
1 large clove of garlic crushed finely
juice of 1 lemon
salt to taste – a little less than ½ teaspoon usually
Method
1. Place the egg yolks in a clean, dry bowl.
2. Add the crushed garlic clove.
3. Beat together well using a small whisk or even a normal table fork.
4. VERY VERY SLOWLY add a couple of drops of olive oil to the garlic and egg mixture. Beat until no trace of the oil remains and it has been well incorporated.
5. Add another couple of drops of oil and again beat in very well until the ingredients are well
amalgamated.
6. Continue to add a few drops of oil at a time, beating in well before adding more oil.
7. This process cannot be rushed. If it is, the results could be disastrous as the entire mixture could separate out.
8. Continue to add the oil slowly until about four ounces have been used up. Then add the salt and about 1 tablespoon of lemon juice and continue beating.
9. At this stage the oil can be added a little more quickly – about a teaspoonful at a time. When about three quarters of the oil has been used up, taste the mayonnaise and adjust the seasoning. More lemon juice and salt may be required.
10. Add the last of the olive oil slowly in a steady stream, beating all the while. Once all the oil has been added, continue to beat until a good thick mixture is produced.
11. Place in a container with a well fitting lid and refrigerate. The very longest that one ought to keep the aioli is for four to five days.
Category
Classes